The Deep Dive: Unpacking Car Evaporator Replacement – Process, Complexity, and Cost
Your car’s air conditioning used to be a welcome relief, but now the AC is struggling, maybe there’s a strange smell, or you suspect a refrigerant leak inside the car. If you’ve researched AC system problems, the term evaporator failure might have surfaced, pointing towards the AC evaporator core. You might understand the symptoms, but now you’re confronting the often staggering cost and complexity of an evaporator replacement. Many car owners ask, “Why does replacing the evaporator core on my 2000 Chevy (or any make and model) cost so much?
Unlike more accessible components, the AC evaporator is buried deep, making its replacement incredibly labor-intensive. Getting to this vital air conditioning system part requires significant disassembly, particularly of the dashboard or instrument panel. This article delves into 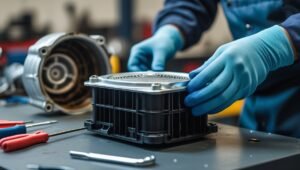 precisely what’s involved in a typical car evaporator replacement, exploring the steps a mechanic or technician must take, and explaining why this specific air conditioning repair is so expensive, regardless of whether you drive a Toyota, Nissan, VW, Volvo, Subaru, Mazda, Chrysler, or Oldsmobile.
A Quick Refresher: The Role of the AC Evaporator Core
Before detailing the replacement, let’s clarify what the evaporator does and why it’s hidden.
- The Heat Absorber: The evaporator acts like a small radiator within your HVAC system, but instead of releasing heat, its primary function is absorbing heat from the cabin air. Cold, low-pressure refrigerant enters the evaporator core, typically in a liquid state. As the blower motor forces warm cabin air across the intricate evaporator fins, the heat from the surrounding air transfers to the refrigerant, causing it to boil and turn into a gas. This process dramatically cools the air blown through your vents.
- Dehumidification: This cooling effect also causes moisture to condense on the cold fin surfaces, which drips into the evaporator case and drains out under the car, dehumidifying the air inside the car.
- Buried Treasure (or Trouble): To cool the air effectively before it reaches the vents, the evaporator is housed deep within the dashboard inside the HVAC plenum box. This box also contains the heater core (which uses hot coolant from the engine to provide heat) and blend doors. Unfortunately, this optimal location for function makes it extremely difficult to access the evaporator for service. Trying to replace the evaporator without removing the dashboard is typically impossible for most vehicles.
When Evaporator Replacement is the Only Option
A mechanic will typically recommend you need to replace the evaporator core for two main reasons:
- Leak Issues: The most common failure is a refrigerant leak. Corrosion from moisture and potential contaminants within the AC system can cause pinholes or cracks in the thin aluminum tubing of the core. A leaking evaporator allows refrigerant (like R134a or newer types often referred to generally, though inaccurately, as Freon) to escape, leading to poor cooling. Sometimes, a faint sweet smell or oily residue indicates the leak is inside the car. Using an A/C sealer product is not a recommended or reliable fix for a leaking evaporator core due to the pressures involved and potential to clog other components like the expansion valve.
- Internal Clog: Severe internal blockages within the evaporator tubing, possibly from compressor failure debris or desiccant material breakdown, can restrict refrigerant flow. While external evaporator fins can get clogged with debris and cleaned, a significant internal clog often necessitates evaporator replacement.
Once diagnosed with a significant internal leak or clog, the standard repair is to replace the evaporator core.
The Mammoth Task: What’s Actually Involved in an AC Evaporator Replacement?
This extensive process highlights why the job is costly. It’s major surgery performed deep within your vehicle’s interior.
Stage 1: System Preparation – Evacuate the Refrigerant
- Safety & Compliance: Before disassembly, the technician must safely recover the existing refrigerant from the air conditioning system. Refrigerant is harmful to the environment and regulated.
- Specialized Tools: A certified mechanic uses an A/C recovery/recycling/recharge machine connected to the high and low side pressure service ports via a manifold gauge set. This machine will evacuate the refrigerant and oil mixture safely.
Stage 2: The Great Dismantling – How Technicians Get Access (The Labor Core)
This stage consumes the most hours labor. To access the evaporator, usually housed near the heater core within the evaporator case or HVAC box, requires removing most, if not all, of the dashboard/instrument panel.
- Component Removal: This involves carefully removing trim, the center console, glove box, instrument cluster, potentially lowering or removing the steering column, disconnecting and safely handling airbags, removing audio and climate controls, unplugging countless wiring harnesses, and disconnecting ventilation ductwork.
- Vehicle Variations: The complexity varies significantly by make and model. For example, accessing the evaporator on some VW or Volvo models might involve different steps than on a Toyota or Chevy. Some jobs may require removing the cowl panel near the windshield, which might also involve removing the wiper motor assembly.
- Dashboard Removal: Finally, the main dashboard structure is unbolted from the firewall and body, then carefully removed from the vehicle. Again, attempting evaporator replacement without removing the dash is rarely feasible.
Stage 3: Extracting the Target – HVAC Unit Removal
With the dashboard out, the HVAC unit containing both the evaporator core and the heater core is visible against the firewall.
- Disconnecting Lines: In the engine bay, the AC lines and heater hoses (carrying engine coolant) must be disconnected where they pass through the firewall. This often requires partially draining the engine coolant.
- Unit Extraction: The entire HVAC box is unbolted and carefully removed.
Stage 4: Open Heart Surgery – Replacing the Evaporator Core
The HVAC unit is taken to a workbench for the actual core swap.
- Case Splitting: The plastic evaporator case is carefully opened.
- Internal Access: Components like the heater core (if blocking access), blend doors, and blower motor resistor might be removed. People sometimes ask if they should have replaced the heater core at the same time; due to the shared labor, this is often recommended if the heater core is old or suspect.
- Evaporator Swap: The old evaporator core is removed. The expansion valve (or orifice tube), which controls refrigerant flow into the evaporator, is almost always replaced simultaneously. A new evaporator / replacement evaporator is installed with new O-rings.
- Reassembly: The HVAC unit is put back together, ensuring all internal parts function correctly.
Stage 5: Putting it All Back Together – Reassembly
This meticulous process mirrors the disassembly in reverse.
- HVAC Unit Installation: The unit is placed back against the firewall, lines (heater hoses, A/C lines) reconnected.
- Dashboard Reinstallation: The main dashboard structure is refitted.
- Component Reinstallation: All previously removed parts (steering column, airbags, wiring, controls, trim, etc.) are carefully reinstalled and reconnected.
Stage 6: Revival and Testing – Recharge and Verification
The final steps bring the air conditioning system back online.
- Vacuuming: The AC system is evacuated using a vacuum pump connected via the manifold gauges. This removes air/moisture and confirms the system is sealed.
- Adding Oil & Refrigerant: The correct type/amount of refrigerant oil and the precise weight of refrigerant (e.g., R134a) are added using the A/C machine. This is the recharge step.
- Leak & Performance Checks: The technician performs thorough leak checks and verifies system operation, monitoring high side and low side pressure readings on the gauge set, checking vent temperatures, and ensuring the compressor and condenser are functioning as part of the now-repaired AC system.
Decoding the Bill: Why is Car Evaporator Replacement So Expensive?
The high cost directly reflects the complexity and resources needed:
Factor 1: Labor Hours – The Dominant Cost
- Time Investment: The extensive hours labor needed for dashboard R&R (removal and reinstallation) to access the evaporator is the biggest factor. This often ranges from 8 to 15+ hours.
- Skilled Labor: This requires an experienced mechanic or technician familiar with intricate vehicle systems, demanding premium labor rates.
Factor 2: The Evaporator Core Part Cost
- Part Price: The new evaporator itself can cost anywhere from $100 to $800+, depending on OEM vs. aftermarket and the specific make and model (e.g., a core for a luxury Volvo may cost more than one for a common Chevy).
Factor 3: Associated Parts – Necessary Add-ons
- Expansion Valve / Orifice Tube: Standard replacement adds
30−30-30−150+. - Receiver/Drier or Accumulator: Mandatory replacement when the AC system is opened, typically
40−40-40−150+. - O-rings/Seals: Essential for sealing connections.
Factor 4: Refrigerant and Supplies
- Refrigerant (R134a / R-1234yf / “Freon”): Cost per pound adds up, especially for newer, pricier refrigerants.
- Oil, Dye: Necessary consumables add to the cost.
Factor 5: Specialized Tools and Equipment
- Shop Investment: Costs cover the use and maintenance of expensive A/C machines, vacuum pumps, leak detectors, and manifold gauges.
Factor 6: Complexity and Risk
- Vehicle Design: Some cars (VW, Subaru, certain Chrysler models) are notoriously complex.
- Potential Issues: Risk of breaking old trim or encountering unforeseen issues during such invasive air conditioning repair.
DIY Evaporator Replacement: Proceed with Extreme Caution
While technically possible for highly skilled individuals, DIY evaporator replacement is not recommended for most.
- Needs: Requires extensive mechanical skill, patience, specialized tools (including manifold gauges, vacuum pump), and legal means to handle refrigerant (evacuate / recharge).
- Risks: High chance of damaging components, incorrect reassembly, airbag mishandling, or improper AC system service, potentially costing more in the long run.
An Investment in Comfort and Air Conditioning System Health
Replacing a car’s AC evaporator core is a major undertaking. The cost reflects the reality: extensive hours labor by a skilled mechanic/technician to dismantle the dashboard, the price of the replacement evaporator and associated parts, the need for specialized tools and regulated refrigerant handling (evacuate, recharge), and the inherent complexity of modern vehicles from Toyota to Volvo. While daunting, understanding why evaporator replacement is so involved helps justify the investment in restoring your air conditioner‘s function and ensuring the health of the entire AC system, including the compressor and condenser. If facing a leaking evaporator, get professional quotes and prepare for a significant but ultimately comfort-restoring air conditioning repair.