Your vehicle’s braking system is arguably its most critical safety feature. The ability to slow down and stop effectively is paramount, not just for your safety but for everyone else on the road. At the heart of this system are two crucial components that work in tandem: brake pads and brake rotors. While often discussed together, they are distinct parts with different lifespans and replacement needs. Understanding the difference between brake pads and rotors, recognizing the signs of bad brake pads and the symptoms of warped rotors, and knowing when to replace each is essential for maintaining your car’s safety and performance. This comprehensive guide will delve deep into 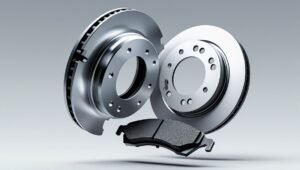 everything you need to know about brake pad replacement and brake rotor replacement, helping you make informed decisions about your vehicle’s maintenance.
Understanding the Fundamentals: How Your Brakes Work
Before we dive into the specifics of pads and rotors, let’s briefly touch upon the basic mechanics of a disc brake system, which is standard on most modern vehicles, at least for the front wheels.
- Pedal Power: When you press the brake pedal, you’re activating a hydraulic system.
- Fluid Force: This action pushes a piston in the master cylinder, which forces brake fluid through the brake lines.
- Caliper Action: The pressurized brake fluid reaches the brake calipers at each wheel. Inside each caliper are more pistons.
- Friction Engagement: These caliper pistons push the brake pads – which are essentially friction material bonded to a steel backing plate – against the brake rotors (the metal discs that rotate with your wheels).
- Stopping Power: The friction created between the pads and rotors converts the kinetic energy of your moving vehicle into heat energy, slowing the rotation of the wheels and bringing your car to a stop.
It’s this crucial friction and the resulting heat that causes wear and tear on both brake pads and rotors over time.
Brake Pads: The Unsung Heroes of Stopping
Brake pads are the components designed to absorb the brunt of the friction. They are, by design, a consumable item, meaning they are meant to wear down and be replaced periodically.
What Are Brake Pads Made Of?
The composition of brake pads significantly impacts their performance, noise level, lifespan, and cost. The main types include:
- Organic Brake Pads (Non-Asbestos Organic – NAO):
- Composition: Made from a mixture of non-metallic fibers like glass, rubber, carbon, and Kevlar, bonded together with resin.
- Pros: Generally quieter, produce less dust, and are gentler on rotors. Often the most affordable option.
- Cons: Wear out faster than other types, may not perform as well under extreme braking conditions or high temperatures (can experience brake fade symptoms more readily). Best suited for daily driving in normal conditions for lighter vehicles.
- Good for: Commuters who prioritize quiet operation and don’t engage in aggressive driving.
- Semi-Metallic Brake Pads:
- Composition: Contain 30% to 65% metal (like copper, iron, steel, or other alloys) mixed with graphite lubricant and fillers.
- Pros: Offer excellent heat transfer and durability, provide strong braking performance across a wide range of temperatures, and are more resistant to brake fade than organic pads.
- Cons: Can be noisier than organic or ceramic pads, produce more brake dust (which can be corrosive to wheels if not cleaned), and can cause more wear on brake rotors.
- Good for: A wide range of vehicles, from passenger cars to light trucks, and drivers who want a balance of performance and durability. Many performance vehicles come with metallic brake pads as standard.
- Ceramic Brake Pads:
- Composition: Made from dense ceramic fibers and non-ferrous filler materials, sometimes with small amounts of copper.
- Pros: Extremely quiet, produce a fine, light-colored dust that doesn’t stick to wheels, offer consistent braking performance over a wide range of temperatures, and are very long-lasting. They are also gentle on rotors.
- Cons: Typically the most expensive option. While excellent for most daily driving and even some spirited driving, they might not dissipate heat as well as semi-metallics in extreme, high-performance track conditions unless specifically designed for it.
- Good for: Drivers seeking the quietest operation, cleanest wheels, and long pad life, often found on luxury vehicles. Ceramic vs metallic brake pads is a common consideration, with ceramics often winning for daily comfort.
- Low-Metallic NAO:
- A variation of organic pads with a small amount (10-30%) of copper or steel added to improve heat transfer and braking power. They offer a middle ground between organic and semi-metallic pads in terms of performance and noise.
Choosing the right brake pads depends on your vehicle type, driving style, and budget. Consulting your owner’s manual or a trusted mechanic can provide guidance.
Signs of Bad Brake Pads: When Do They Need Replacing?
Your car will usually give you several tell-tale signs that your brake pads are nearing the end of their service life. Ignoring these can lead to more expensive repairs and, more importantly, compromise your safety.
- Squealing or Screeching Noises: This is often the first indicator. Many brake pads are equipped with a small metal tab called a brake pad wear indicator. When the pad material wears down to a certain thinness, this indicator scrapes against the rotor, creating a high-pitched squeal or screech when the brakes are applied (and sometimes even when they’re not). This is your car’s built-in alarm system saying, “Time for new pads!”
- Grinding Noise When Braking: If you hear a deep, metallic grinding noise when braking, this is a serious warning. It usually means the friction material on the pads has completely worn away, and the metal backing plate is now grinding against the brake rotor. This can rapidly damage the rotor (requiring replacement) and significantly reduce your stopping power. Stop driving and get your brakes inspected immediately.
- Increased Stopping Distance: If you notice your car is taking longer to stop than usual, or you have to press the brake pedal harder or further to achieve the same stopping power, your brake pads may be severely worn or contaminated.
- Thinning Brake Pads (Visual Inspection): You can sometimes visually inspect your brake pads through the spokes of your wheels. If the friction material appears to be less than 1/4 inch (about 6mm) thick, it’s generally time for a replacement. Some pads have a wear groove; when it’s no longer visible, replacement is due. A brake inspection checklist used by mechanics will always include measuring pad thickness.
- Vibration or Pulsation in the Brake Pedal or Steering Wheel: While this is more commonly a sign of warped rotors (which we’ll discuss later), extremely worn or unevenly worn brake pads can sometimes contribute to these sensations.
- Brake Warning Light: Many modern vehicles have a dashboard brake warning light that illuminates when the brake system detects a problem, which can include low brake fluid (often a consequence of worn pads, as caliper pistons extend further) or sensor-detected pad wear.
- Pulling to One Side When Braking: If your car veers to the left or right when you apply the brakes, it could indicate uneven wear on the brake pads, a stuck caliper, or a problem with the brake hydraulics on one side.
How Long Do Brake Pads Last?
The lifespan of brake pads can vary significantly, typically ranging from 25,000 to 70,000 miles (or 40,000 to 110,000 kilometers). Several factors influence this:
- Driving Habits: Aggressive driving with frequent hard braking will wear out pads much faster than smooth, gentle driving with gradual stops. City driving with lots of stop-and-go traffic also tends to wear pads more quickly than highway driving.
- Brake Pad Material: As discussed, organic pads wear out fastest, while ceramic pads generally last the longest. Semi-metallic pads fall in between.
- Vehicle Type and Weight: Heavier vehicles like trucks and SUVs require more force to stop, putting more strain on the brake pads and causing them to wear faster.
- Rotor Condition: Rotors that are warped, scored, or below minimum thickness can accelerate pad wear.
- Environmental Conditions: Driving in hilly or mountainous areas requires more frequent braking, leading to faster pad wear.
It’s crucial to rely on symptoms and regular inspections rather than just mileage for determining when to replace brake pads. How often to check brakes should ideally be with every oil change or at least twice a year.
Brake Rotors: The Disc That Takes the Heat
Brake rotors (also known as brake discs) are the large metal discs that your wheels are bolted to (indirectly, via the hub). When the brake pads clamp down on the rotors, the friction slows the rotor’s rotation, and thus the wheel’s rotation.
What Are Brake Rotors Made Of?
Most brake rotors are made from grey cast iron because it offers good heat dissipation and wear characteristics at a reasonable cost. Some high-performance or luxury vehicles may use rotors made from more exotic materials like:
- Carbon-Ceramic: Extremely lightweight, highly resistant to brake fade, and very long-lasting, but also very expensive. Typically found on supercars and high-end sports cars.
- Steel Alloys: Sometimes used for specific performance applications.
Types of Brake Rotors:
- Solid Rotors: Simple, solid discs of metal. Typically found on the rear brakes of smaller cars or older vehicles where less braking force and heat dissipation are required.
- Vented Rotors: These are the most common type for front brakes. They consist of two discs joined by internal fins or vanes. This design creates an air passage through the rotor, allowing for significantly better cooling and heat dissipation, reducing the risk of brake fade symptoms.
- Drilled Rotors: These rotors have holes drilled through the braking surface. The original purpose was to allow gases and water to escape from between the pad and rotor, improving wet-weather performance and initial bite. They can also help with cooling. However, the drilling process can sometimes create stress points, potentially leading to cracking under extreme use if not manufactured to high standards. Drilled vs slotted rotors is a common debate for performance enthusiasts.
- Slotted Rotors: These rotors have slots machined into the braking surface. These slots also help to expel gas, water, and brake dust, improving pad bite and keeping the pad surface clean. They can be more durable than drilled rotors in terms of crack resistance but may cause slightly faster pad wear and can sometimes produce a whirring noise.
- Drilled and Slotted Rotors: Combine both features, aiming for the benefits of each.
For most daily driving applications, standard vented rotors are perfectly adequate and offer the best balance of performance, durability, and cost.
Symptoms of Warped Rotors (or Bad Rotors): When Do They Need Attention?
Brake rotors are much more durable than brake pads, but they don’t last forever. They are subjected to immense heat and pressure, which can lead to wear and damage over time.
- Pulsating Brake Pedal: This is the most common symptom of warped or unevenly worn rotors. When a rotor is not perfectly flat, the brake pads will move in and out slightly as they press against the uneven surface. You’ll feel this as a rhythmic pulsation or throbbing sensation through the brake pedal when you apply the brakes, especially during moderate to hard braking. This is a classic sign of pulsating brake pedal issues.
- Vibrations in the Steering Wheel or Car: Similar to pedal pulsation, warped front rotors can cause vibrations that you feel through the steering wheel when braking. If the rear rotors are warped, you might feel a vibration through the seat or the entire car.
- Visible Grooves or Scoring: Over time, deep grooves or scoring can develop on the rotor surface, often due to worn-out pads grinding against them or debris getting caught. These imperfections reduce the contact area between the pad and rotor, diminishing braking effectiveness.
- Blueish Discoloration or Heat Spots: Excessive heat can cause “hot spots” or a blueish tint on the rotor surface. This indicates the rotor has been overheated, which can change its metallurgical properties and make it more prone to warping or cracking.
- Grinding or Scraping Noises: While often a sign of worn-out pads, if the pads are good, these noises could indicate a severely damaged or cracked rotor.
- Reduced Braking Performance: Any significant damage to the rotors can compromise their ability to dissipate heat and provide a consistent friction surface, leading to reduced stopping power.
Brake Rotor Resurfacing vs. Replacement: What’s the Best Option?
When brake rotors show signs of wear like minor warping or light scoring, you might have two options: resurfacing (also called machining or turning) or replacement.
- Rotor Resurfacing: This process involves putting the rotor on a specialized lathe and shaving off a very thin layer of metal from both surfaces to restore a flat, smooth finish.
- Pros: Can be less expensive than buying new rotors.
- Cons:
- Not always possible: Rotors have a “minimum thickness” specification stamped on them. If resurfacing would take the rotor below this minimum thickness, it must be replaced. Resurfacing removes material, making the rotor thinner and less able to dissipate heat, increasing the risk of future warping or even cracking.
- Doesn’t fix severe damage: Deep grooves, significant warping, or cracks cannot be fixed by resurfacing.
- Labor costs: Sometimes, the cost of labor for resurfacing can be close to the cost of new, budget-friendly rotors, making replacement a better long-term value.
- Rotor Replacement: This involves installing brand-new rotors.
- Pros: Ensures optimal performance and heat dissipation. New rotors are at their full thickness, providing the best longevity and resistance to warping. Often the recommended approach, especially when installing new brake pads.
- Cons: Generally more expensive than resurfacing (for the parts themselves).
When to Choose Which:
- Consider Resurfacing If: The rotors are only slightly warped or have very light scoring, AND they have sufficient thickness remaining above the minimum specification. Some mechanics will resurface rotors as a standard part of a brake job if they meet these criteria.
- Opt for Replacement If:
- Rotors are at or near their minimum thickness.
- Rotors are heavily scored, deeply grooved, cracked, or severely warped.
- The cost to replace brake pads and rotors with new components is not significantly higher than pads plus resurfacing, especially considering the longer life of new rotors.
- You’re upgrading your brake pads (e.g., to ceramic or performance pads), as new pads perform best with a fresh, perfectly flat rotor surface.
Many modern repair shops and DIYers lean towards replacement, as rotor prices have become more competitive, and it guarantees the best performance and safety. What happens if you don’t replace brake rotors when they are bad? You risk significantly reduced braking effectiveness, further damage to new brake pads, and potential brake failure.
The Interplay: Why Often Replace Brake Pads and Rotors Together?
While brake pads wear out more frequently than rotors, it’s often recommended – and sometimes necessary – to replace them in pairs (meaning both pads and rotors on an axle at the same time). Here’s why:
- Optimal Performance and Bedding-In: New brake pads need a smooth, flat surface to bed-in properly. Bedding-in is the process where a thin layer of friction material from the pad transfers to the rotor surface, creating an optimal friction interface. If you put new pads on old, worn, or grooved rotors, they won’t bed-in correctly, leading to reduced braking performance, noise, and accelerated wear of the new pads.
- Rotor Condition: By the time your brake pads are worn out, your rotors have likely accumulated significant wear as well. They might be thinner, slightly warped, or have developed surface imperfections. Even if they could be resurfaced, putting new pads on them means those new pads are starting life on a rotor that’s already partly worn.
- Preventing Premature Pad Wear: Uneven or grooved rotors will cause new brake pads to wear down unevenly and much faster than they would on new or freshly resurfaced rotors.
- Cost-Effectiveness in the Long Run: While replacing rotors adds to the upfront cost, it can save you money in the long run by ensuring your new pads last their full lifespan and by preventing a potential second trip to the mechanic if the old rotors cause issues shortly after a pad-only replacement.
- Safety: Brakes are a safety-critical system. Ensuring both pads and rotors are in top condition provides the best possible stopping power and reliability.
Generally, expect to replace rotors with every one or two sets of brake pads, depending on your driving habits and the quality of the components. If your rotors exhibit any of the “bad rotor” symptoms mentioned earlier, they should be replaced regardless of how old the pads are.
The Replacement Process: DIY vs. Professional Service
When it’s time for a brake job, you have two main options: do it yourself (DIY) or take it to a professional mechanic.
DIY Brake Pad Replacement (and Rotor Replacement)
For those mechanically inclined and equipped with the right tools, replacing brake pads and rotors can be a manageable DIY project that can save significant labor costs.
Basic Steps (Highly Simplified – Always Consult a Repair Manual for Your Specific Vehicle):
- Gather Tools and Parts: New pads, new rotors (if replacing), brake cleaner, brake grease, jack, jack stands, lug wrench, socket set, C-clamp or piston compressor tool, wire brush, torque wrench.
- Safety First: Park on a level surface, engage the parking brake, chock the wheels.
- Loosen Lug Nuts: Before jacking up the car.
- Jack Up and Secure: Use jack stands – never work under a car supported only by a jack.
- Remove Wheel.
- Remove Caliper Bolts: This allows you to slide the caliper off the rotor. Support the caliper (don’t let it hang by the brake hose).
- Remove Old Pads: Note their orientation.
- Remove Caliper Bracket (if replacing rotor): This bracket holds the caliper and pads.
- Remove Old Rotor: It might be held by a small screw or just rusted on.
- Clean Hub Surface: Crucial for the new rotor to sit flat.
- Install New Rotor.
- Clean and Lubricate Caliper Bracket and Slide Pins.
- Reinstall Caliper Bracket.
- Compress Caliper Piston(s): Use a C-clamp or specialized tool to push the piston(s) back into the caliper housing to make room for the thicker new pads. Open the brake fluid reservoir cap first and monitor fluid level to prevent overflow.
- Install New Brake Pads: Apply brake grease to contact points on the backing plates (not the friction material!).
- Reinstall Caliper.
- Reinstall Wheel.
- Torque Lug Nuts to Spec.
- Repeat for Other Side (on the same axle).
- Pump Brake Pedal: Before driving, pump the pedal several times to seat the pads and build hydraulic pressure.
- Bed-In New Brakes: Follow the manufacturer’s recommended bedding-in procedure (usually a series of moderate stops from different speeds).
Cautions for DIY:
- Brakes are a safety system. If you’re unsure, don’t attempt it.
- Always use jack stands.
- Follow torque specifications precisely.
- Be careful with brake fluid (it’s corrosive).
- Properly dispose of old parts and fluid.
Professional Brake Service
Taking your car to a qualified mechanic or dealership for brake service is the most common approach.
Benefits:
- Expertise and Experience: Professionals have the knowledge, tools, and experience to do the job correctly and safely.
- Proper Diagnosis: They can accurately diagnose any underlying issues (e.g., stuck caliper, leaking hose).
- Access to Quality Parts: Reputable shops use quality OEM or equivalent aftermarket parts.
- Warranty: Most professional brake jobs come with a warranty on parts and labor.
- Efficiency: They can typically complete the job much faster than a DIYer.
- Comprehensive Check: They’ll likely perform a more thorough brake inspection checklist, including checking brake fluid condition, lines, and hoses.
The cost to replace brake pads and rotors professionally will include parts and labor. Labor rates vary by region and shop. Expect to pay anywhere from $300 to $800+ per axle, depending on vehicle make/model and the type of parts used. Luxury and performance vehicles will be on the higher end.
Cost to Replace Brake Pads and Rotors: What to Expect
Several factors influence the final bill:
- Vehicle Make and Model: Parts for luxury cars, sports cars, and heavy-duty trucks are generally more expensive.
- Type of Pads and Rotors: Basic organic pads and solid rotors are cheaper than high-performance ceramic pads and drilled/slotted rotors.
- Front vs. Rear Brakes: Front brakes usually do more work and often have larger, more expensive components.
- Labor Rates: Vary by shop and location.
- Additional Repairs: If other issues are found, like a seized caliper or leaking brake line, costs will increase.
- Resurfacing vs. Replacement: Resurfacing (if an option) might be slightly cheaper for rotors initially, but replacement offers better long-term value.
Always get a detailed quote upfront that itemizes parts and labor. Don’t be afraid to ask questions about the parts being used.
Beyond Pads and Rotors: Other Brake Maintenance Tips
Maintaining your brake pads and rotors is crucial, but don’t forget these other aspects of brake care:
- Brake Fluid Flush Importance: Brake fluid is hygroscopic, meaning it absorbs moisture over time. This moisture can lower the fluid’s boiling point (leading to brake fade), cause corrosion in the brake lines and components, and reduce system effectiveness. A brake fluid flush importance cannot be overstated; most manufacturers recommend flushing and replacing brake fluid every 2-3 years.
- Regular Inspections: As mentioned, how often to check brakes should be part of your routine maintenance. Have a mechanic inspect the entire system during oil changes or at least annually.
- Listen to Your Car: Pay attention to any new noises, sensations, or changes in brake pedal feel. Early detection can prevent more costly repairs.
- Check Brake Lines and Hoses: Inspect for cracks, leaks, or brittleness.
- Caliper Health: Ensure calipers are not sticking or seized, as this can cause uneven pad wear and overheating.
- Good Driving Habits: Avoid aggressive braking, tailgating, and unnecessary hard stops to prolong the life of your brake components. Coast to slow down when possible.
Prioritizing Safety Through Brake Maintenance
Brake pads and brake rotors are the dynamic duo of your vehicle’s stopping power. While brake pads are designed to wear and be replaced more frequently, brake rotors also have a finite lifespan and require attention, whether it’s resurfacing or, more commonly, replacement.
Recognizing the signs of bad brake pads (like squealing or grinding) and the symptoms of warped rotors (like a pulsating brake pedal) is the first step. Understanding when to opt for brake rotor resurfacing vs. replacement and why pads and rotors are often replaced together helps in making informed maintenance decisions.
Whether you’re a seasoned DIYer tackling a DIY brake pad replacement or prefer the expertise of a professional brake service, the goal is the same: ensuring your braking system is in optimal condition. Don’t skimp on brake maintenance; your safety, and the safety of others, depends on it. Regular checks, timely replacements using quality parts, and attention to the entire braking system, including the brake fluid flush importance, will keep you stopping safely and confidently for many miles to come. When in doubt, always consult a trusted mechanic. Your brakes are too important to ignore.